Steps to Use Codegeist Excel Addin
Hi! My name is Harsh Bhavsar. And this is the detailed instruction on how to use codedigest excel add-in to create bulk jira issues from Excel desktop app or from Excel online.
Excel Desktop App
-
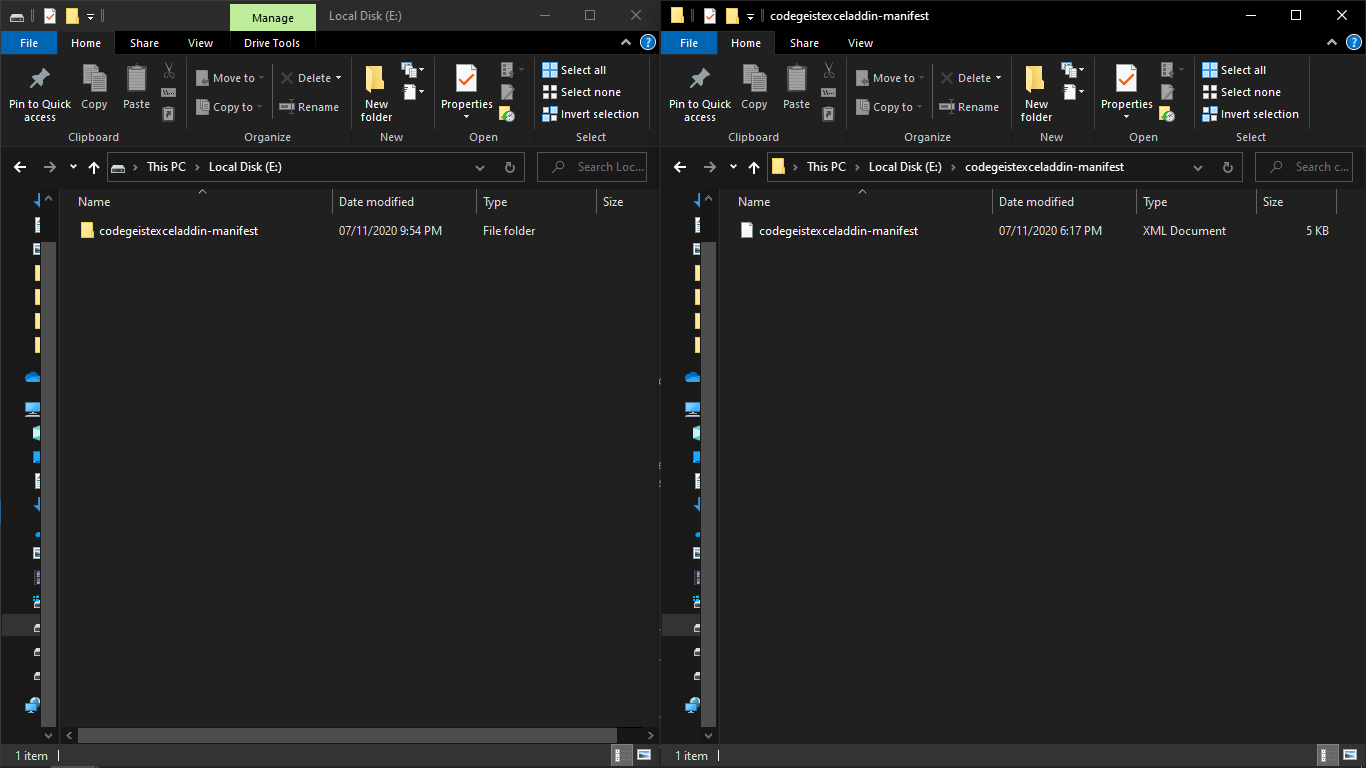
Download “JiraIssuesTemplate” from here and “codegeistexceladdin-manifest” from here
-
To sildeload manifest file in Excel desktop app.
-
Create a folder with any name and copy manifest file in it
- Right click on this folder, go to properties , click on “sharing” tab then “share” button. In Next window add yourself and any other users that you want to add click on “share” button.
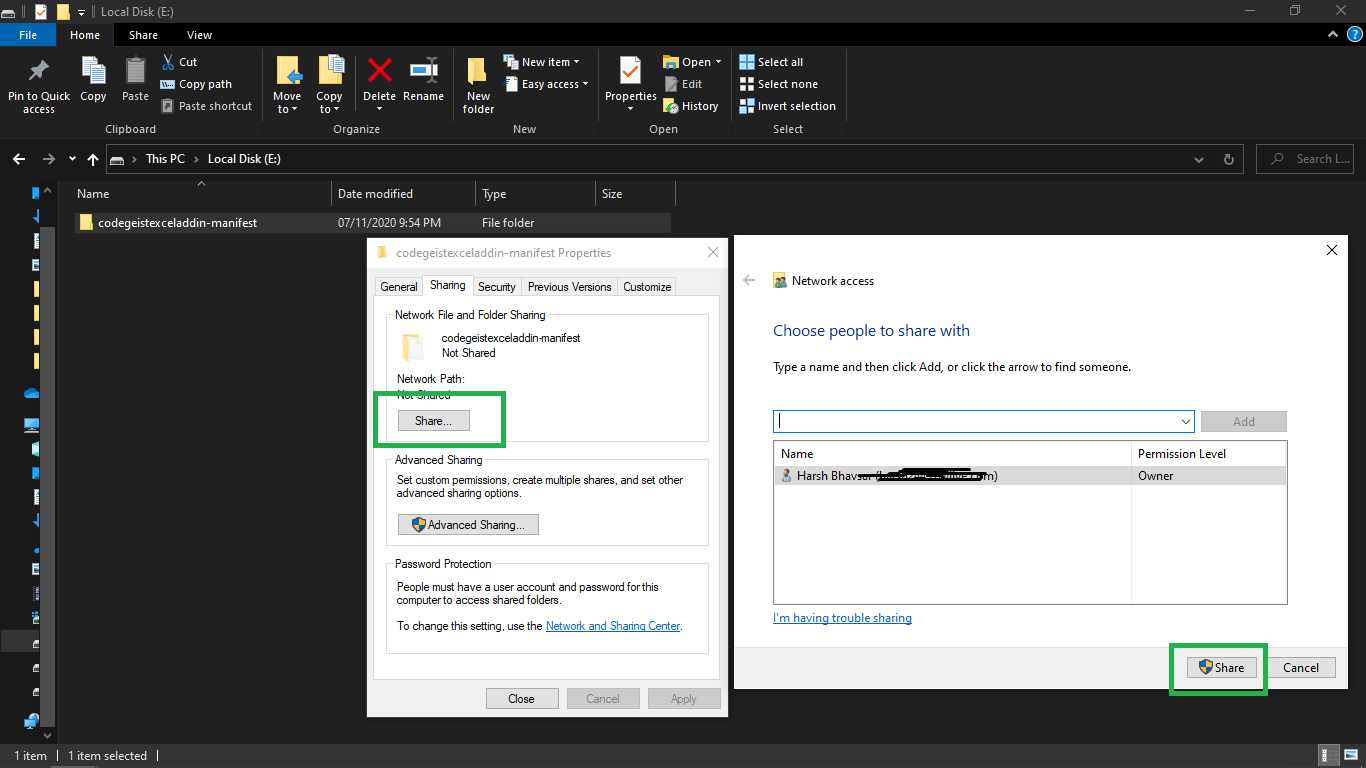
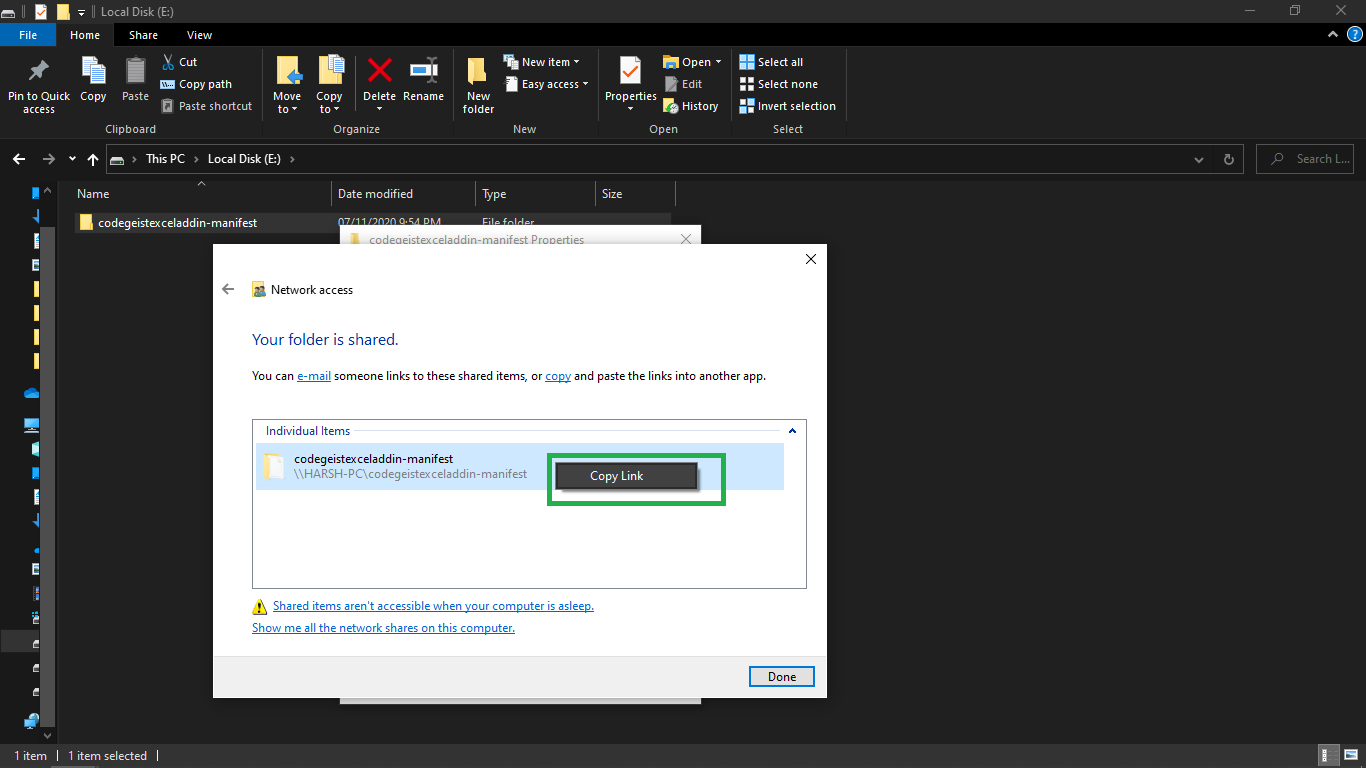
- This will share folder. Copy link from next screen.
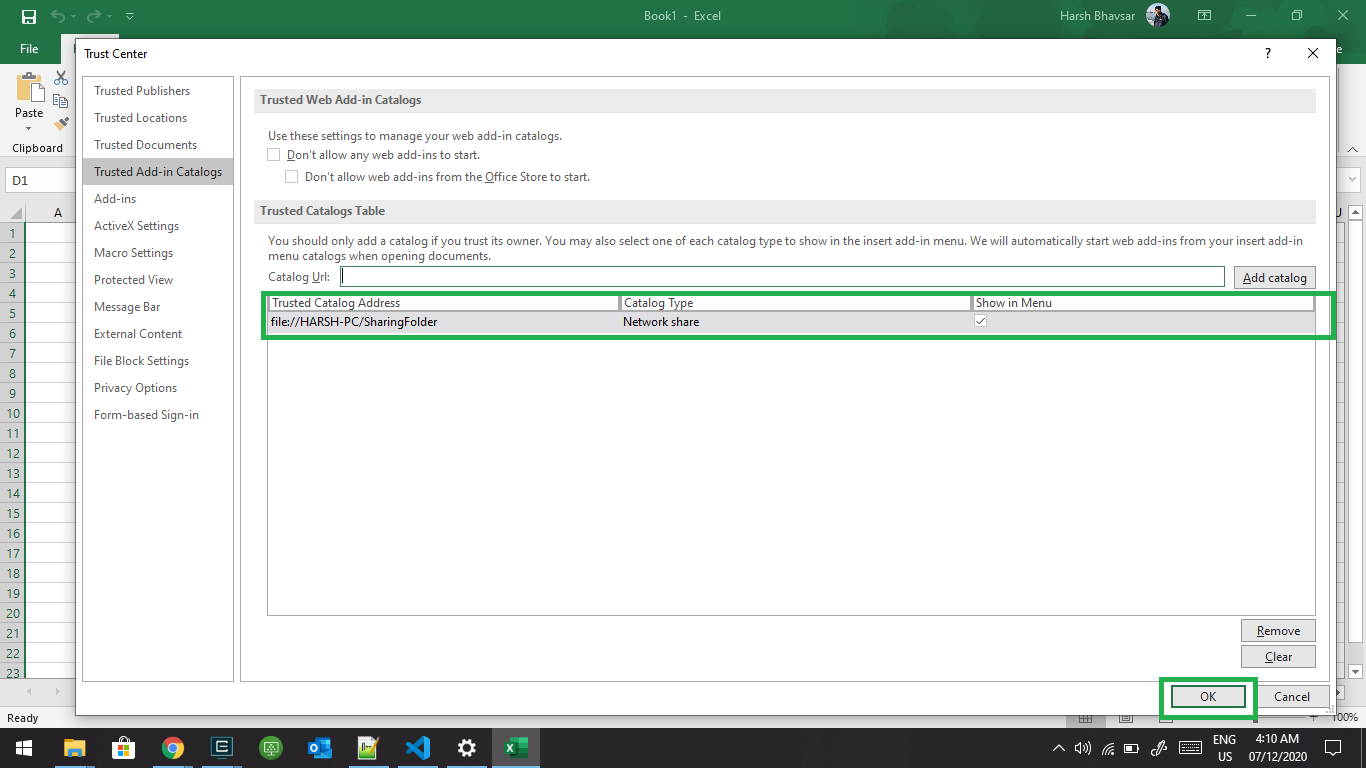
-Now open blank document in Excel.Go to File Tab > Options > Trust Center > Trust Center Setting > Trusted Add-in Catalogs
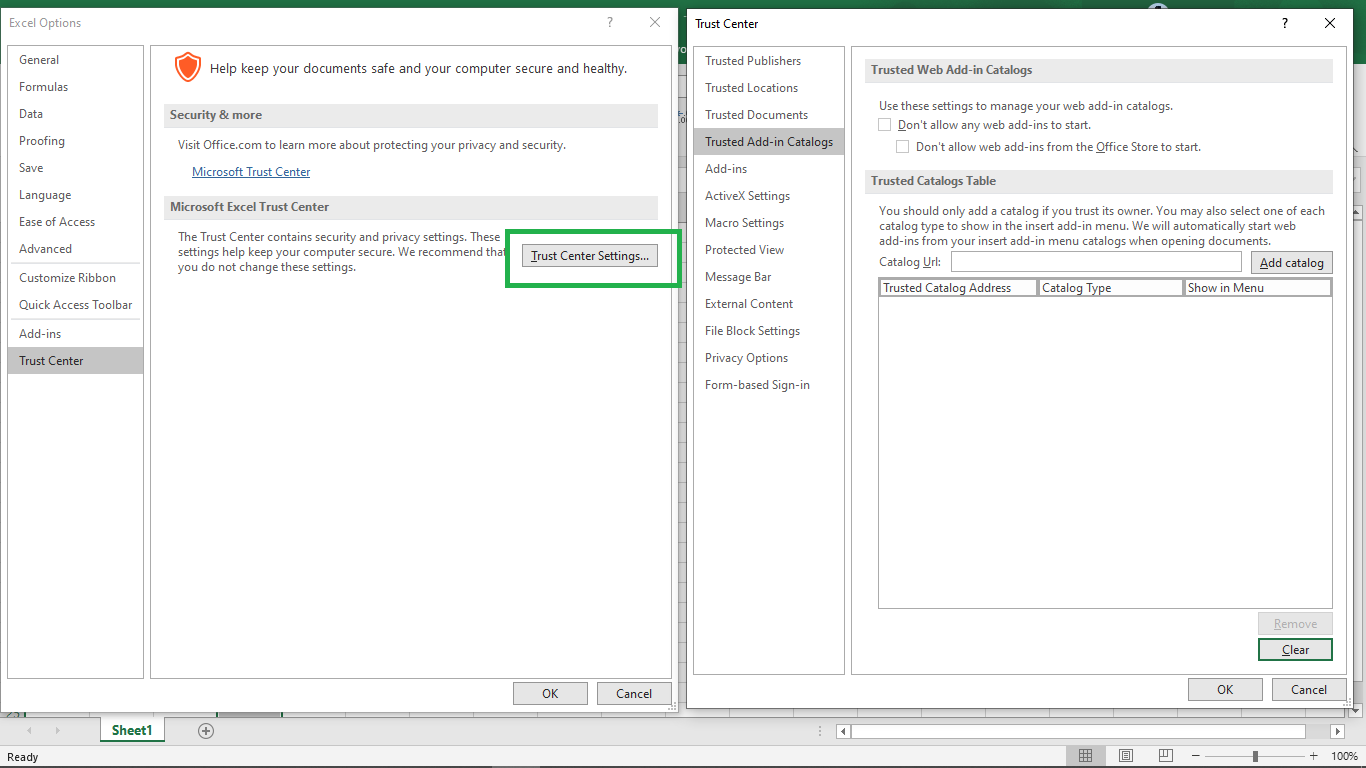
- In the Catalog Url box, enter the full network path to the shared folder catalog, and then choose Add Catalog. ex. file://HARSH-PC/SharingFolder
- Select “Show in Menu” check box, and click “OK” button
- Close Excel app so our changes will take effect
- Now open “JiraIssuesTemplate” that was downloaded.
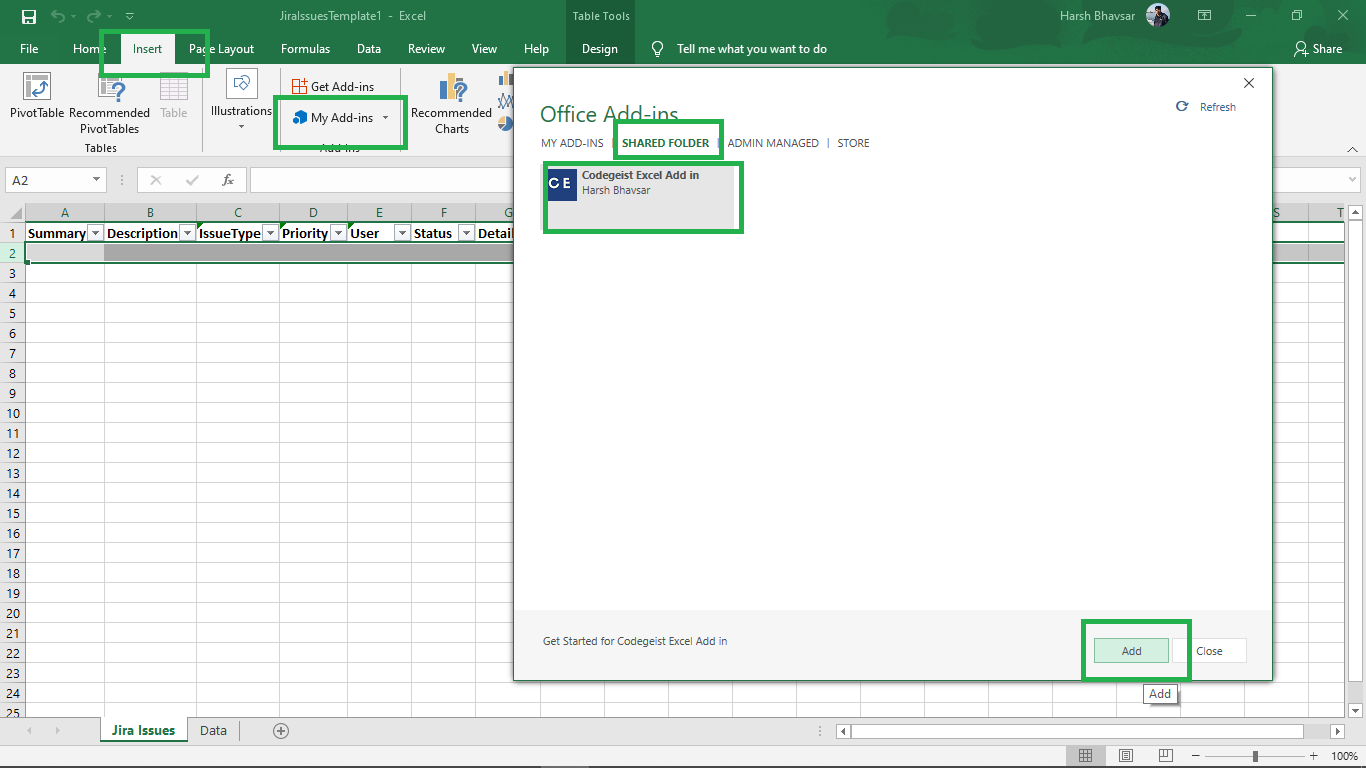
- Go to “Insert” from ribbon > My Add ins > “Shared Folder” from opened popup . Here you will find “Codegeist Excel Addin” add-in. Select that add-in and click “Add” button.
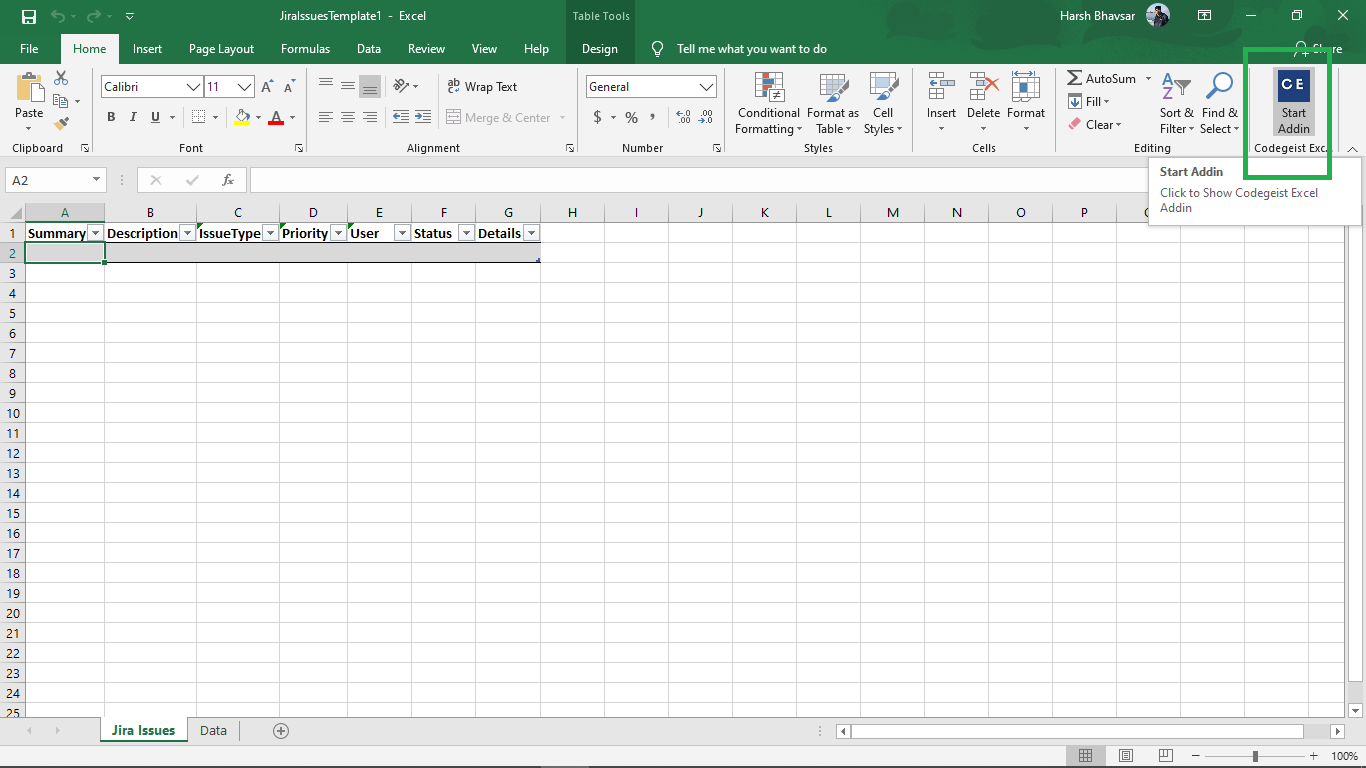
- This will add “Codegeist Excel Addin” in Excel which will available in top right corner in Home ribbon. Click on “Start Addin” button to get started.
Excel Online
- Download “JiraIssuesFile” from here and “codegeistexceladdin-manifest” from here
- To sildeload manifest file in Excel online.
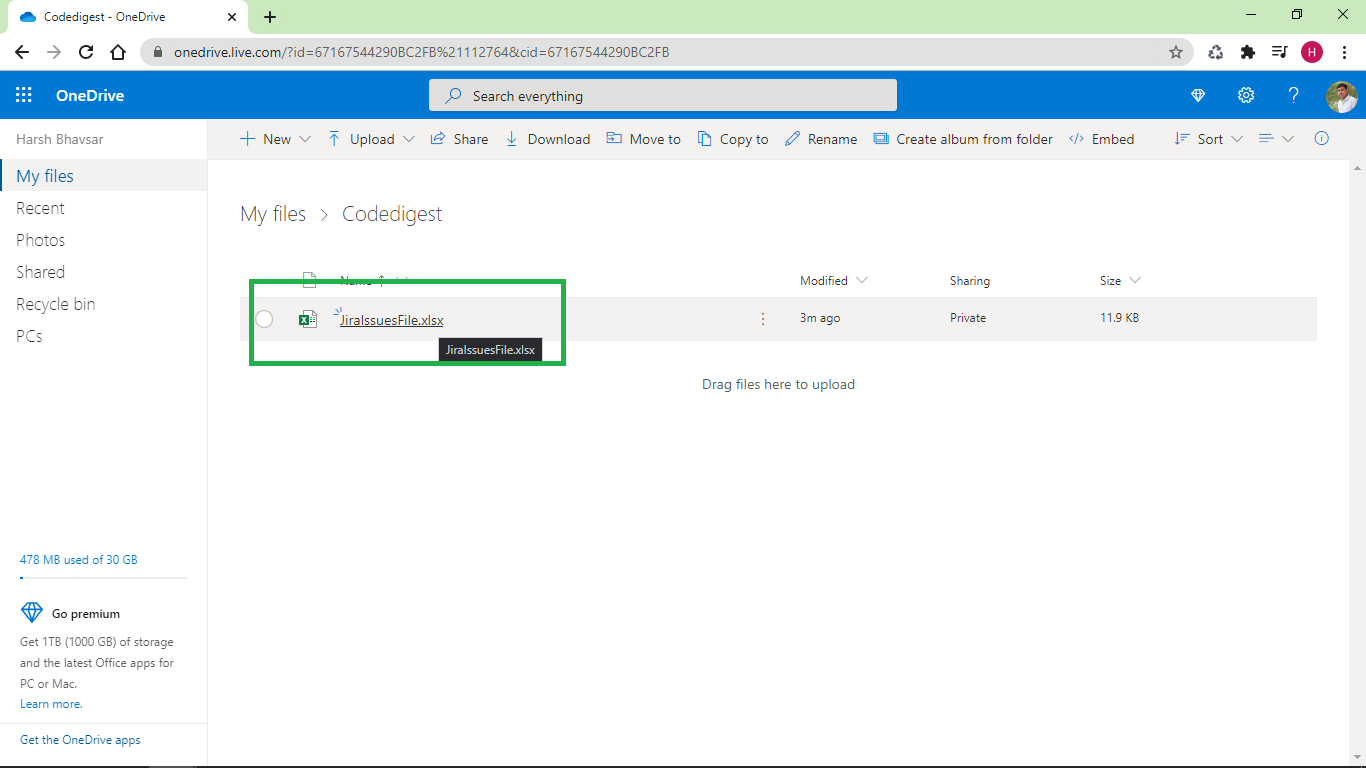
- Open one drive or One drive for business.
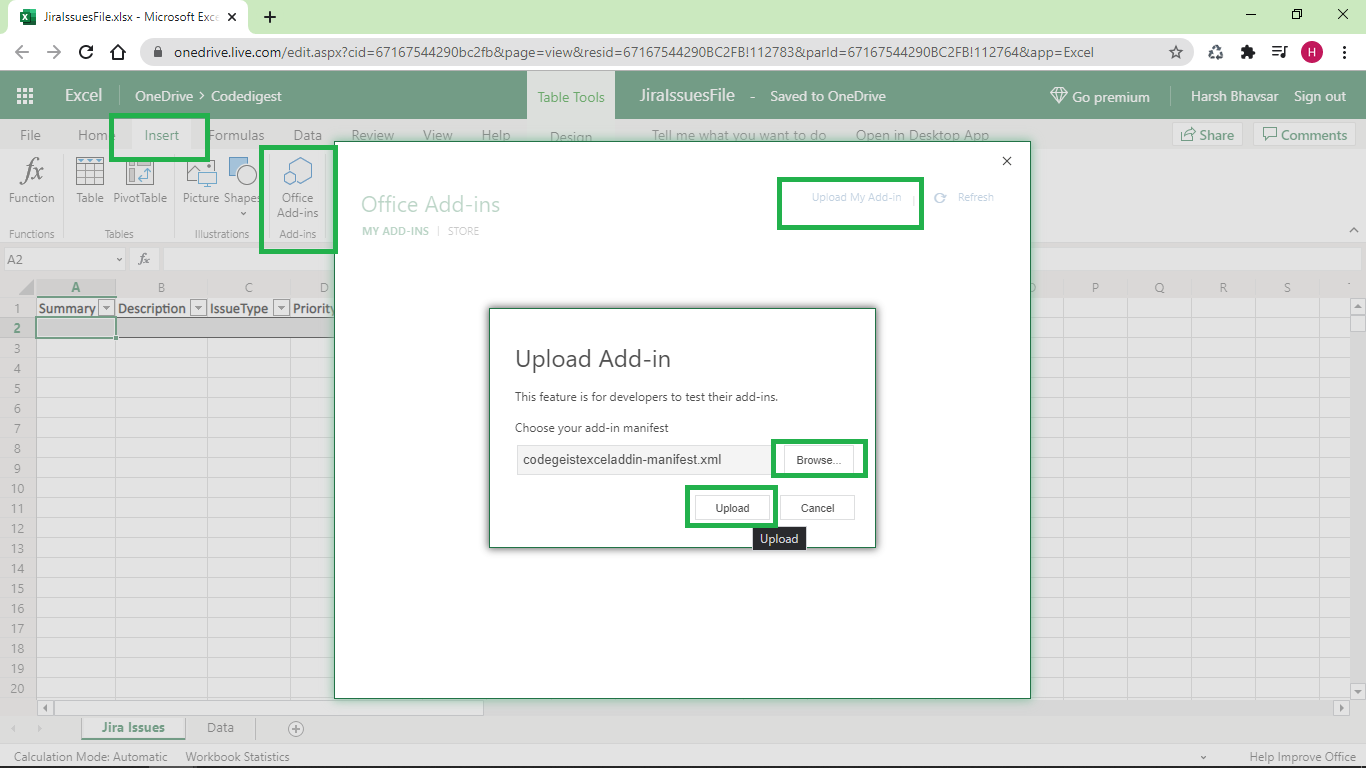
- Upload “JiraIssuesFile” in any of the folder and open this file.
- Click on “Insert” from ribbon > “Office Add-ins” > “Upload My Add-in” from opened popup > Browse for “codegeistexceladdin-manifest” file and click on “Upload” button.
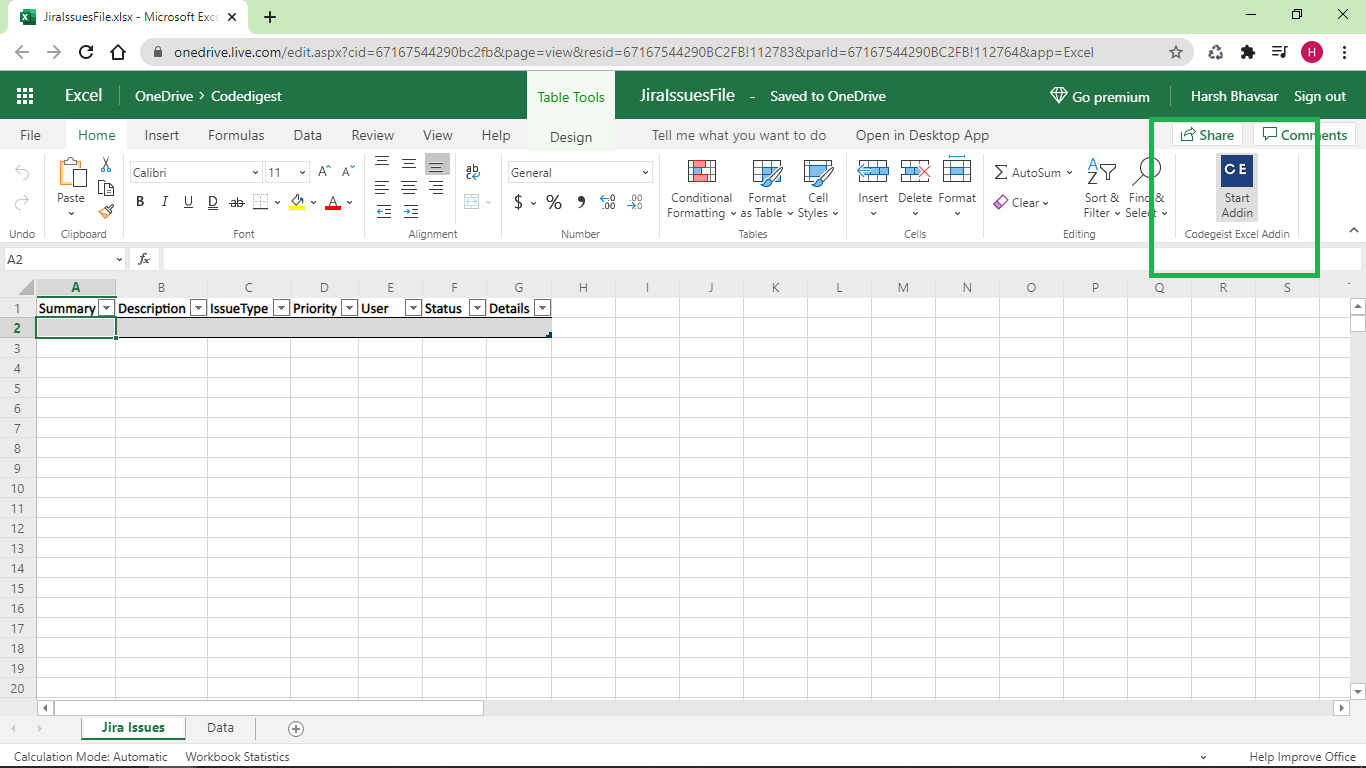
- This will add “Codegeist Excel Addin” in Excel online file which will available in top right corner in Home ribbon. Click on “Start Addin” button to get started.
For More information on sideloading add-in navigate here on MSDN link.
How to use “Codegeist Excel Addin” to add bulk issues from Excel
Now as process for both for Excel desktop app file and Excel online file are same. I will demonstrate one of this.
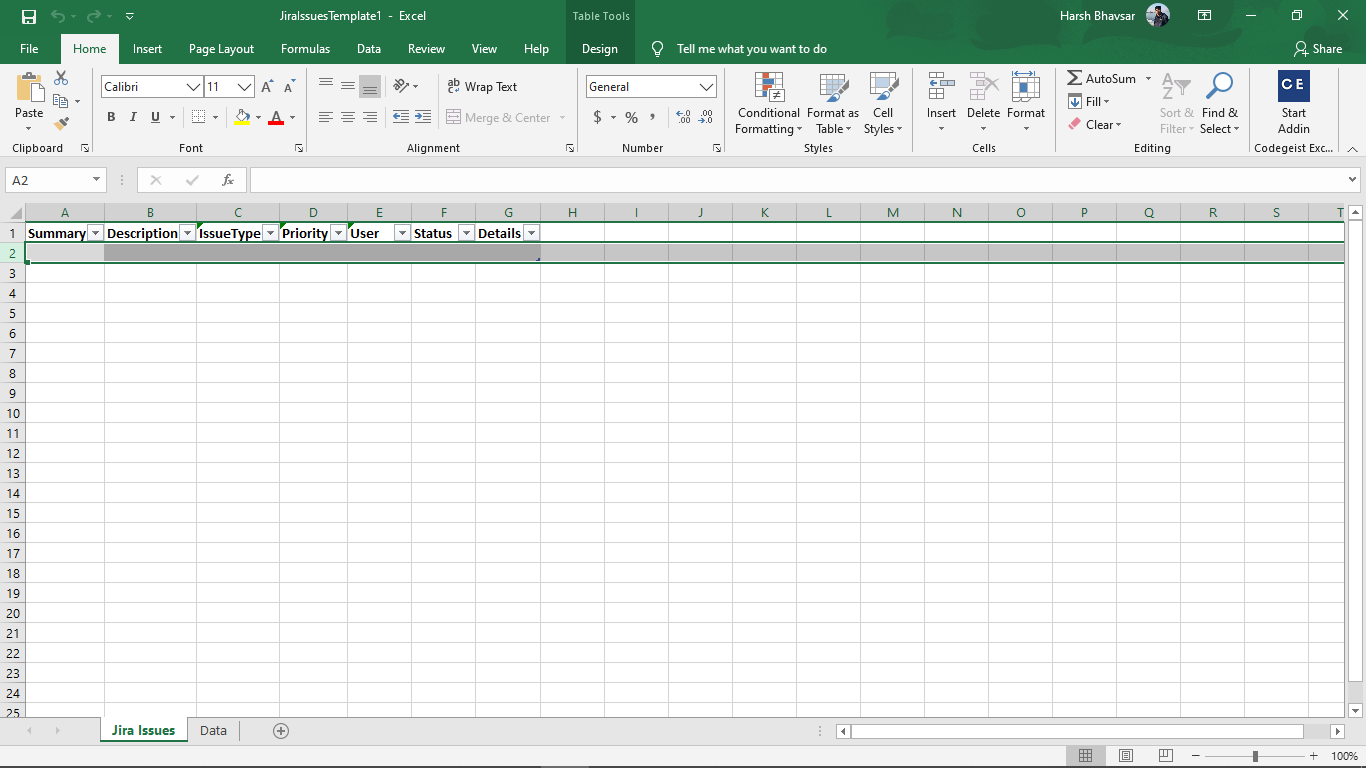
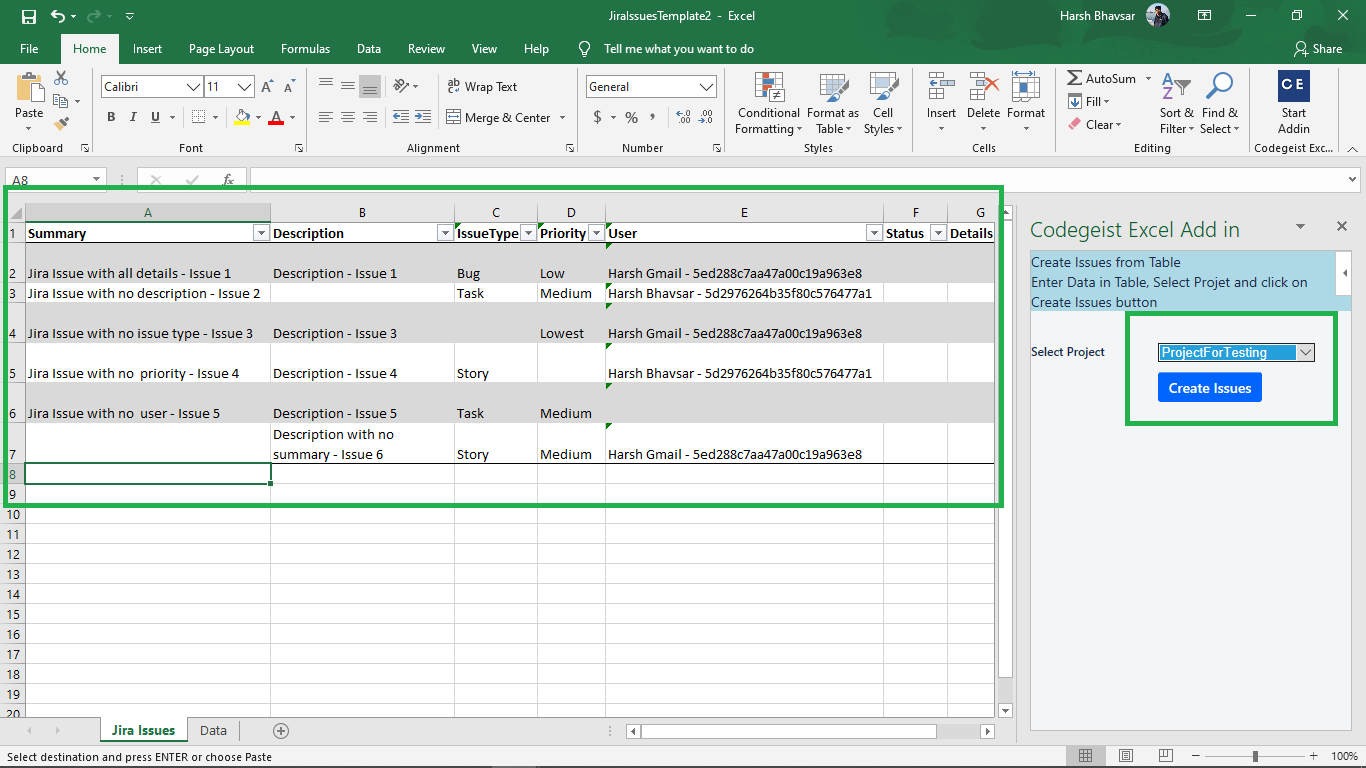
- There are 2 work sheets in this file/template. One is “Jira Issues” and other is “Data”.
- At first, none of the table from any sheet contains ant data
- In “Jira Issues” sheet, there is a table “JiraIssuesTable” in which we can add details for Issues that we want to create.
- in “Data” sheet, there is a table “UsersTable” in which details for users will be added automatically while using add-in and these user details will be available for “User” column in “Jira Issues” sheet.
- Click on “Start Addin” from “Codegeist Excel Addin” will open add-in in sidebar.
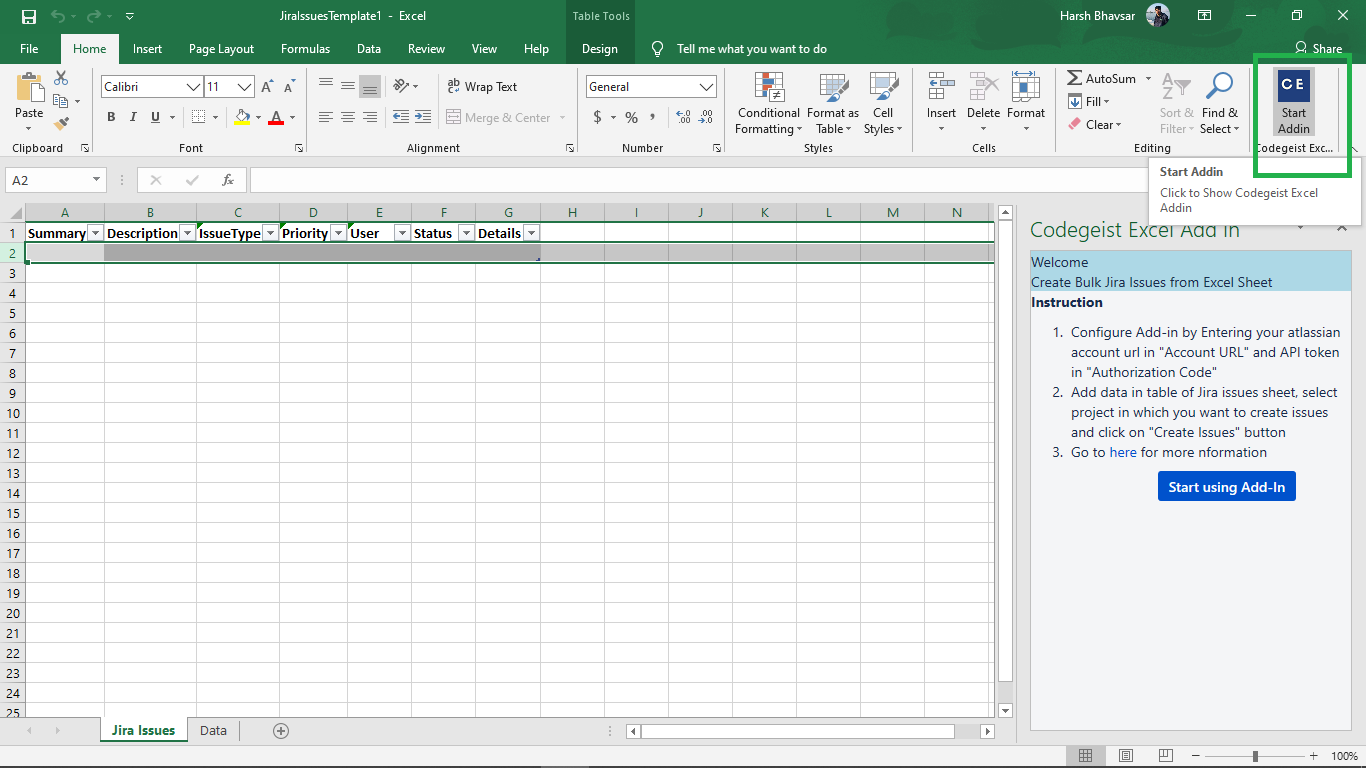
- Click on “Start using Add-in” button will open page to configure data.
- Add your Atlassian account url in “Account URL” text box. This should be something like "https://xxx.atlassian.net”
- Add API token that you can create from here in “Authorization Code” text box.
For more information see details here
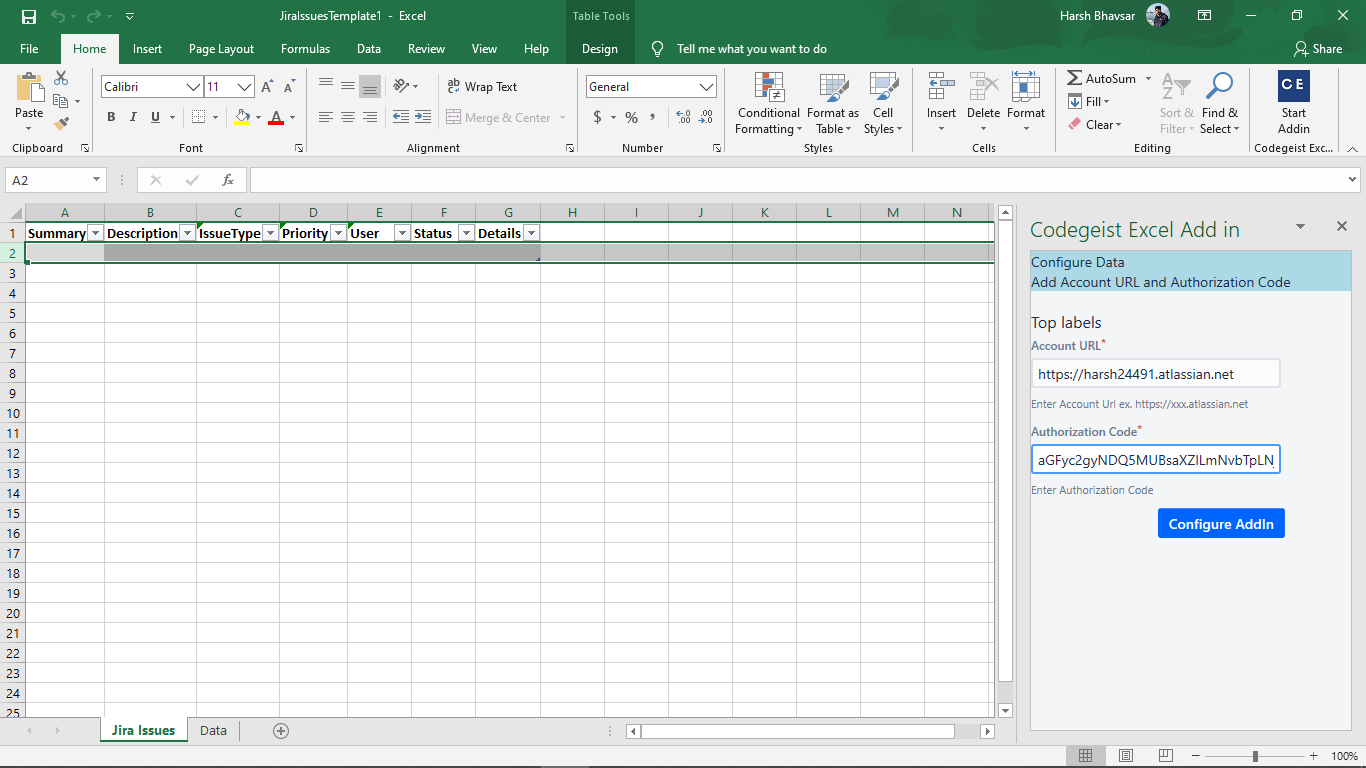
- On click of “Configure Addin” button will pull projects and Users from your Atlassian account . This will add projects in “Select Project” drop down and Users in “UsersTable” of Data worksheet.

- Add data in table of “Jira Issues” sheet.
| Column | Details | Is Required |
|---|---|---|
| Summary | This will be text filed which will be Summary for Issue | Yes |
| Description | This will be text filed which will be Description for Issue | No |
| IssueType | This will be drop down from one of value from Bug,Task or Story which will be Issue type for issue | Yes |
| Priority | This will be drop down from one of value from Highest,Medium,Low or Lowest which will be priority for issue | Yes |
| User | This will be drop down from one of value from “UsersTable” of “Data” worksheet which will be Assignee for issue. This will be in “User - ID” format | No |
| Status | You don’t have to add data in this column. This will be set status of row either success or error | No |
| Details | You don’t have to add data in this column. This will be set link for issue for success status and error message for error status | No |
- Now add Some Rows in “JiraIssuesTable” of “Jira Issues” sheet. Select Project from drop down in which you want to create issues and click on “Create Issues” button.
-
This will parse each row from table and will add issue in jira.
-
This will add stats either Success or Error based on result of operation in Status Column .
-
This will add URL of issue for Success operation and Error message for Error operation in Details column.
-
This also will add status message of count for total rows processed, suceess and error.
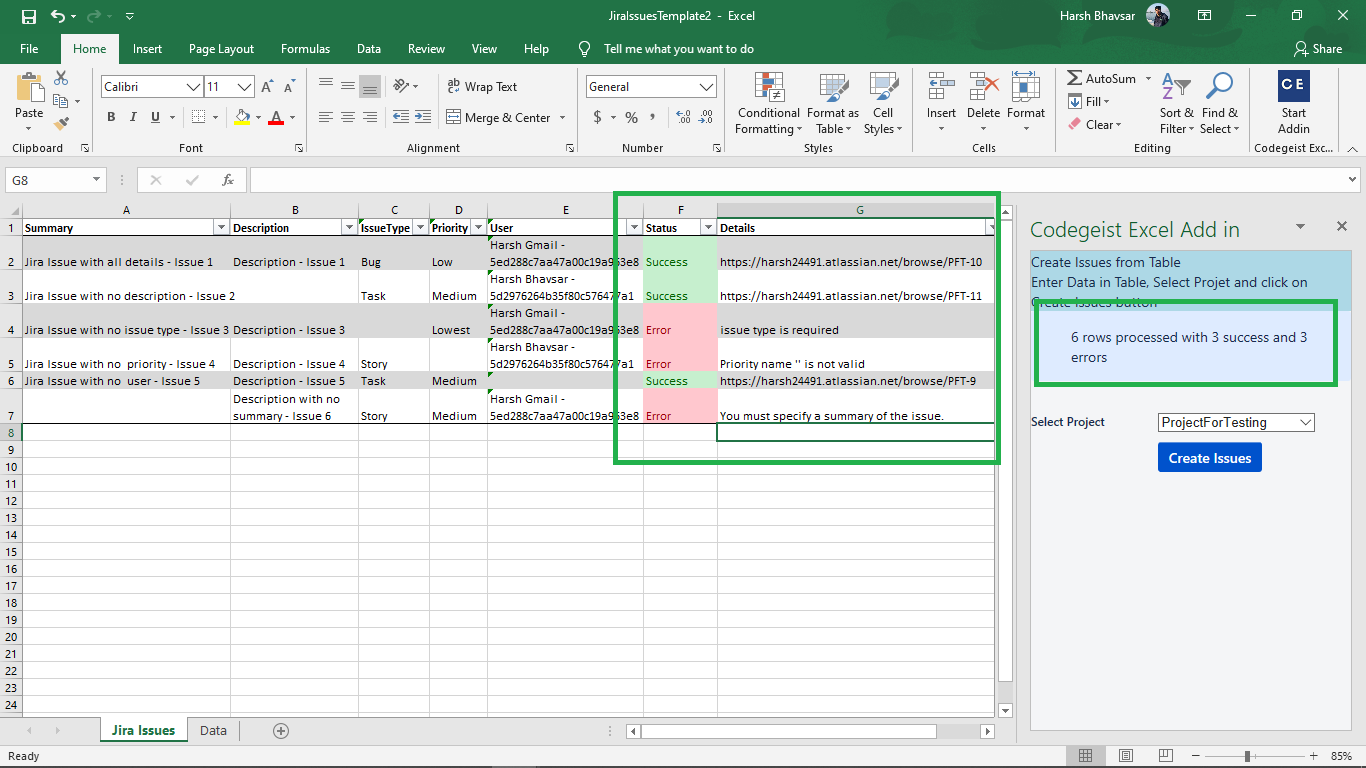
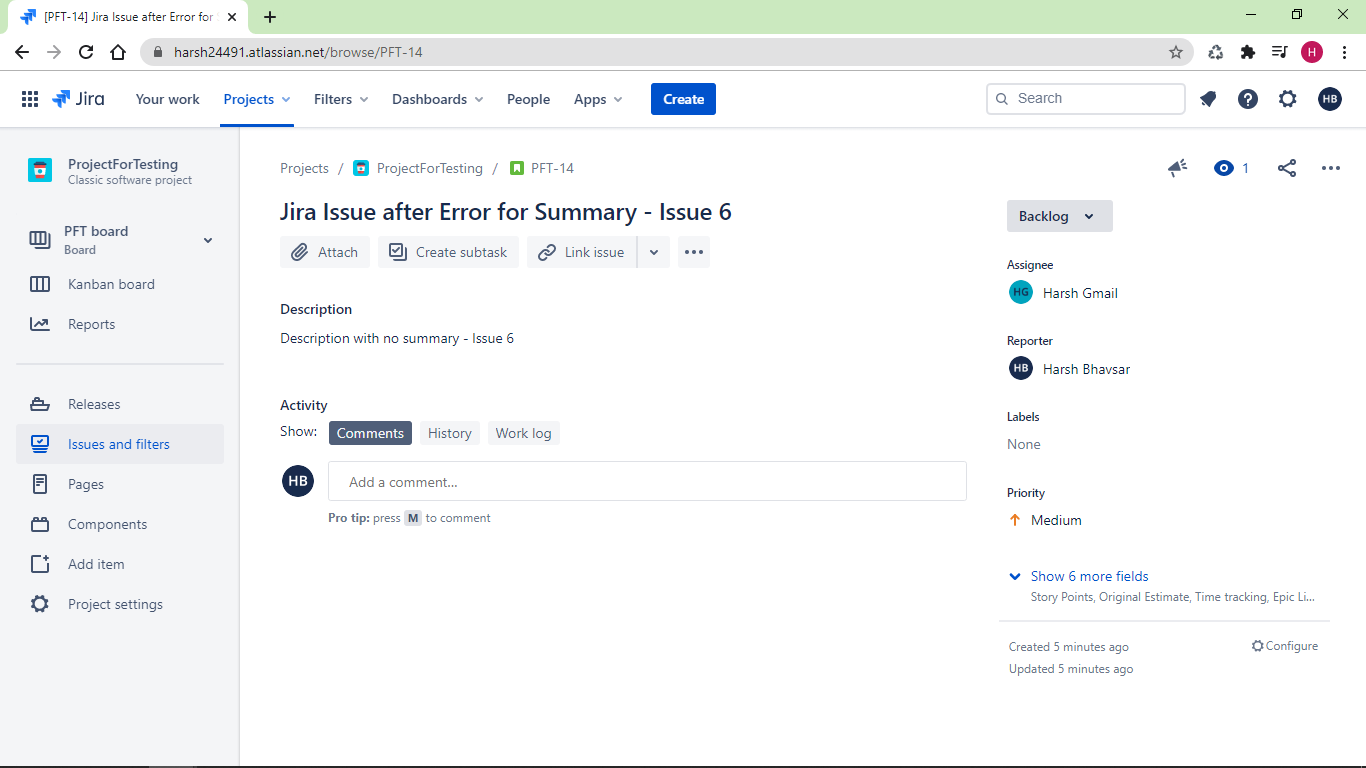
- Fix those rows from “Details” column and click on “Create Issues” again.
- This will only run for Status with Error and any new row if added only. Will not create issue again for already created.
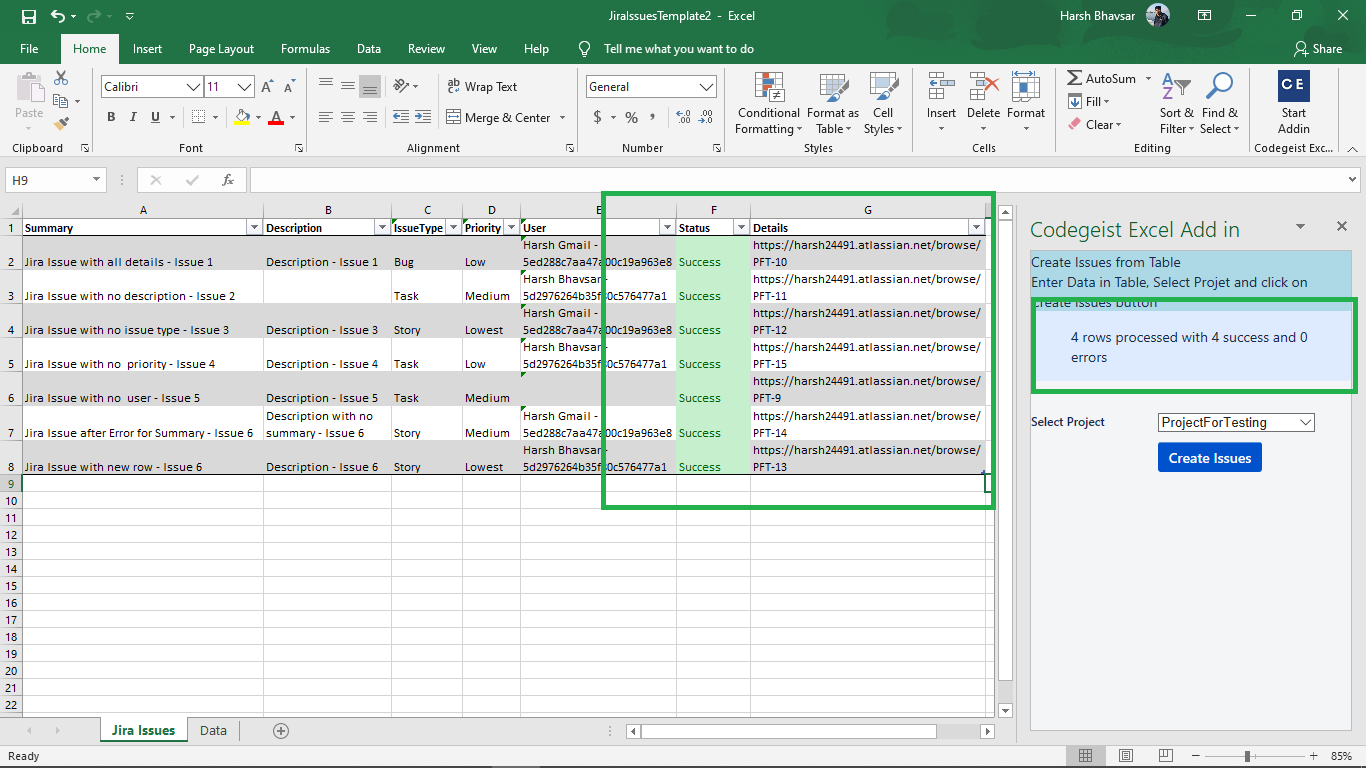
- As shown in image above, this time 4 rows processed 3 with fix errors and 1 new row.
- Copy any link from “Details” column and open in browser to cross verify for the same.
Couclusion
So, This is the process, how we should use “Codegeist Excel Addin” to bulk create jira issues from either Excel desktop app or Excel online.